Showing posts with label electrical. Show all posts

Thursday, 9 April 2015

Electrical system upgrade

Since is has been so long since I have done a proper update I'll summarizing the updates to each system.

Back in August I was running a 2500 watt 12v inverter, 2 x 200 watt solar panels and a cheap charge controller.  I was having to run the generator a couple of hours a day to keep the batteries from going dead with minimal use of electricity.

I put in my order for my new solar system in September.  I was excited and nervous, it was awesome.  I've been researching and waiting for over a decade to have a off grid system and it was finally happening.  I was nervous because it was going to be $7,000.

The first thing to arrive was the charge controller which would allow me to run the panels at over 100 volts and the battery bank at 48 volts.  Shortly after receiving the charge controller I sold the inverter for a nice profit but I had to make do for a few weeks with a cheap inverter.


While waiting for the parts to come in I make another trip to the states for batteries.  It was funny watching the suspension when they dropped the 16 golf cart batteries in the truck bed.

More power!

The wrong panel for the inverter came in so I had to wait a another week for it to come in but that gave me time to order cables for the new panels.  Once the cables and proper electrical panel arrived I got to work installing them.  The new inverter gives me 4400 watts at 240 volts, more than I'll need.  The electrical panel handles the DC breakers and main AC breakers, including inverter bypass.


The batteries will be tucked under the cabinetry so I needed a way to pull them out for maintenance.  I made two skate boards for them to sit on


6 of the 9 panels @ 250 watts each.  I've been using the solar setup most of the winter.  My generator has not been used since the fall.  On cloudy days I make 1 to 2 KWh and over 10KWh on sunny days.  I've stopped using propane to heat my water because I produce so much electricity.


Just recently I installed and wired the AC breaker box.  I'm pretty happy with the job I did.  I just have a few more circuits to add and it needs to be permanently installed once the cabinetry is done.
Before

After


Sunday, 27 April 2014

So its been two months...


The tiny house has been on the back burner for the last couple of months.  I decided to focus on school and pretty much everything else was put on the back burner.  The last two weeks I've been off so I've put a lot more time into the house and I have a few tasks nearing completion so there should be some big changes in the next few weeks.

I have still accomplished a few things while in school.  The bay window is almost done.  It have wiring, sheathing, insulation and vapour barrier done.  With wiring passing through the bay window I have also been able to finish the wiring and insulation on the last wall.

The vapour barrier on the north wall is mostly done.  I just have to pass a few more wires thru it before I can finish.

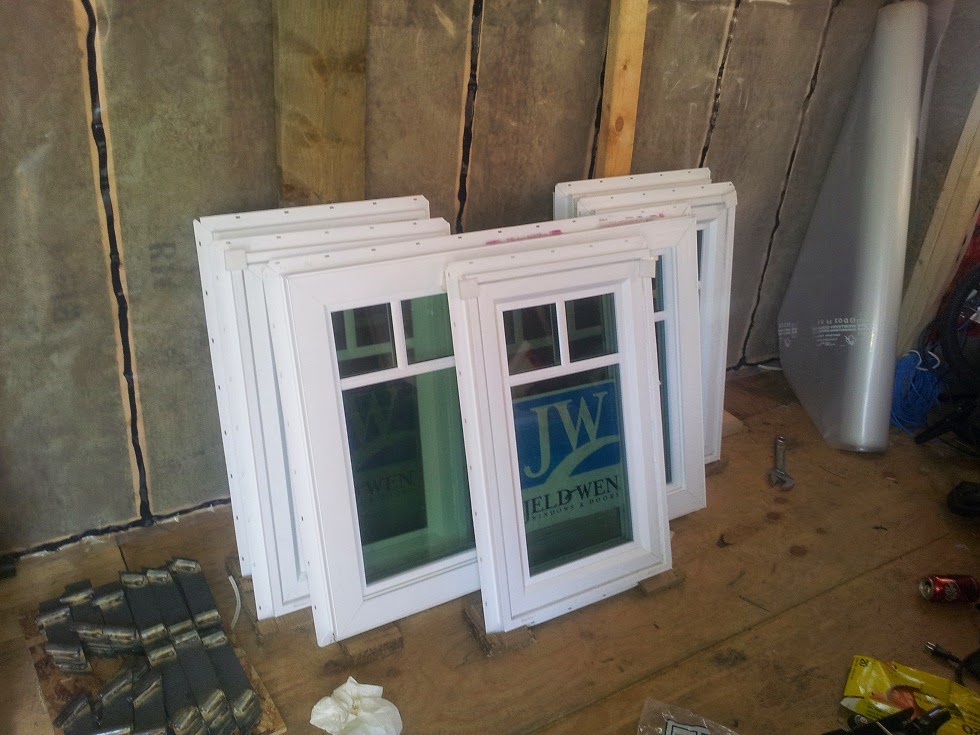
The windows have mostly arrived.  There was no packing during shipping so some of the screens where damages.  I have to make another trip to the states to pick up the last 3.

I found a store locally that has roofing for the same price as in the states.  They have more choice of colours so once that is sorted out then I'll be ordering it.  As a bonus they will cut to length for me.

I've been busy the last week fabricating the brackets for the roof extensions.  I have spent about 16 hours making the 40 brackets but I think the end result will be worth it.


I've been super geeking out over the performance of my solar setup.  It has been producing enough power to keep the welder going without having to run the generator.  At one point the panels where producing over 30A even though they are only rated to produce 22A.  :)

Expenses to date: $17,014

Tuesday, 4 February 2014

Finishing in wall wiring and starting insulation

It's been a productive week.


Drilled 2 1/4" hole and installed the AC in connector.  I wanted to put in the void next to the wheel well but that didn't work out, this was the next best area.  I temporally wired it in with a 12 gauge interior wire until I can find a RV cord to use.  On the inside I connected up 3 plugs so I don't have to used the extension cords as much.

Ran through the 500ft box of network cable that I brought up from the states.  It was going to be $90 for another 500ft from Home Depot.  Luckily I managed to find 721ft for $60 on our local classified site.  I decided to run a DC line to the bay window area, I might end up using it for lighting or to run the computer and accessories directly.

There are around 20 network lines, 4 AC lines and 5 DC wires that feed into this area.  It looks like a mess be it will all be organized once the interior wall goes in.

Started installing the insulation on Saturday.  The bottom pieces are taking about 10 to 15 minutes each because I have to measure the locations of all the wires and rods so I can cut a slot in the insulation for them to slide into.

I even have some of the loft done

But it's still a mess :)


Expenses to date: $11,654

Tuesday, 28 January 2014

More wiring

I dropped down to the states to pick up the connections so I can plug the house it.  While I was down there I picked up a box of network cable.  I'll be using it connect sensors throughout the house and in the doors and windows.  Did I mention I plan on doing a little home automation?  More on that in the coming months.

On Sunday I ran the network cable and started wiring up the wall outlets, soon I'll be able to get rid of all the extension cords.

This is the point that all the wires will pass through the vapour barrier into the interior wall.  It looks like a mess but they are all labelled.  The yellow wire is a 20 amp line for a electric heater.  The three white wires are for the room plugs/exterior plugs/upstairs plugs.  The black wires are DC lines from the solar panels.  The thin grey wires and blue wire are data and low power DC for the home automation.

All of the in wall wiring is done so I can move onto insulation now :-D


Expenses to date: $11,367

Tuesday, 21 January 2014

Wiring and doing things the hard way

The past week has been spent on getting the electrical figured out.

I had originally run all the 15amp AC wiring but I've had to pull it all because it would have exceeded the capacity of the electrical boxes.  You can use a box fill calculator to determine the maximum number of wires/devices/clamps that an electrical box can hold.  Unfortunately the 14/3 wire means I'll be about 4 cu in over what the boxes can hold.  There are two ways to fix this, either use 14/2 and I lose the extra wire, or go with a bigger box.  I want to use 3 x 2 x 2.5 boxes so I have 1 1/2" behind the box for insulation so that leaves me with only one option, pulling all the 14/3 out and replacing it with 14/2.

I've also run the wires for solar panels.  I was going with a roof mounted panels but now I'm thinking a ground mount might be better.  To play it safe I ran wires to both locations.

I'm only running the wires for the exterior walls right now, once the insulation and interior wall is in I'll be finishing up the electrical.

In places where wires might rub against the threaded rod I wrapped rubber tape around the rod.


I've purchased the connections for hooking up to external power and I'll have to do a run down to the states to pick those up.  While I'm down there I'll pick up network cable so I can run that and I'll order the Grace Ice and Water Shield for the roof.

I welded the two 1/2" threaded rod that I added in the front corner.  Nice to finally cross that off the list.

To finish up the day I attached the four pieces of blocking that the ceiling will be nailed at the gable ends.  These should have been put before the roof sheathing was put on but I forgot.  It would have been impossible to do without my brother's palm nailer.


Expenses to date: $ 10,981

Thursday, 9 January 2014

Cramming it all in

First a little catching up on the blog.

I finished one of the wheel well boxes!  I just have to lift the floor sheathing to drill a couple of holes but more on that later


Last Friday and Saturday I gave a friend a hand with her project, she needed a hand putting the roof on a large chicken coop that she what putting under her deck.  By then end I was temped to get a couple of chickens when I'm done.  On Sunday she returned the favor by giving me a hand.  The first two rafters where only 8" apart and it was going to cause me problem with putting up some of the strong ties and blocking.  I finally clued in that I could just move in another 8" in and it would solve the problems.  After taking care of that we put the sheathing on the steep part of the roof.  We just managed to get it all done just as the sun set!  I now have half a roof and I got to use my climbing gear :).


For the last week I've been taking time in the evenings to do some of the interior planning
ng.  I have to fit the inverter, charge controller, 16 deep cycle batteries, electrical panel, fridge, oven, dishwasher, washing machine, furnace, ducting, wiring and plumbing in a very limited amount of cabinetry.  On top of that the inverter needs less then 10ft of wire between it and each of the battery banks.
This give you an idea of how tight the space is.  The hot water tank had to be put in the bathroom
Starting of the left. Shower pan (grey), sink(grey), toilet(purple), hot water tank(blue), furnace and ducting(green), electrical panel(yellow), oven(grey below panel), dishwasher(grey below oven), fridge(grey), washing machine(grey)
Hiding under all that are the two battery banks, one on each side.  The tall yellow box near the round duct is the inverter.

Toilet is so large because I was originally going to with a commercial unit.  The problem is almost all of them get poor reviews with some users having overflowing issues.  On the other hand there seems to be a number of people sticking with their "temporary" 5 gallon pail system.

Once I finished with all that planning done I can now drill the holes I mentioned earlier.  There will be two of them.  One to carry the DC wires from the north battery bank (rear wall in the preview drawing).  The other will carry both the supply wire from the service entrance along the north wall and under the floor plus the wire from the inverter to the electrical panel.  The inverter will be located where the is on the floor and other two holes are near the tape measurer.

To make sure I didn't put a hole in the vapour barrier I lifted the plywood up and slid some 2x4s and plywood under where I was drilling, that is why I have to wait to put the wheel well boxes in place.  With the holes drilled I finished the second one and nailed them in place, now I have more storage for the tools :)


Expenses to date: $ 10,550

Wednesday, 1 January 2014

Loot for the house

Happy New Year!


My brother was in town for the holidays and he was able to lend a hand on the house.  He drilled all the holes for the electrical runs while I worked on the framing around the wheel wells.

I had ordered some thing from American RV and they had arrived at the shipping outlet just across the boarder.  I have to give kudos to them for their pre-sales support. The furnace was not a regularly stocked item and they contacted their supplier to see if they could get it shipped out before the Xmas shutdown.  Things worked out and I had it less then 2 weeks after it was ordered.  There prices where very good too.

The second company that I have to give kudos to is Propane Depot in Vancouver BC.  I forgot to order a second hose and I needed a few more fittings.  The person that helped me was very knowledgeable and even answered my questions about the rest of my propane system.  So if you need anything propane related and you are around Vancouver you should drop in.

A couple of things I learned:
The hoses before the propane regulator should not droop lower then the top 20% of the tank.  If they do propane liquid can form and that may damage the hoses and regulator.
There is no standard for circuit breakers.  Make sure you buy the right ones for your panel.


So here is everything I bought
Square D electrical panel
4 x 20amp breakers
8 x 15amp breakers
20' Copper gas line
CO and propane alarm
Double flare tool
Auto change-over propane regulator, hoses and fittings
Fittings and valves for propane
Atwood 1522 dual stage ducted furnace and door
Suburban 6 gallon gas/electric hot water heater and door


I'll use the electric heater on the hot water heater as a dump load when my batteries are fully charged.  It should save some propane in the summer.


Expenses to date: $10,505

Wednesday, 25 December 2013

Merry xmas

I hope everyone is having a great xmas!

Ordered the furnace, hot water tank, propane hoses and regulator.  They have been delivered to a shipping outlet just south of the border.  I also ordered and received some LED strip lighting but I was less then impressed so I ordered a different kind.

I bought the inverter that I talked about at the beginning of the month (Magnum MS4448PAE) .  It turns out he ordered it for a project but it fell through.  The seal on the box wasn't even broken.  I saved about $800 plus shipping taxes and duties.  Unfortunately he didn't want the outboard but I did get in running and I'll sell it in the spring.  Now I just need 16 batteries, more solar panels and a better charge controller.  I'll be breaking the cost of the solar system out of the running total due to it heavily skewing the cost of the tiny house.


Now that the sheathing is done I had help from a classmate and a roommate to help put the Typar up.  After about a thousand staples it is securely attached.  I left out a row or two around every opening, this is so i can come back later and flash them.


The threaded rod is installed everywhere. I cleaned out a couple of stores and found out it pays to shop around.  Here is what I paid at each location for 10' lengths (except HD which was 6')


       1/2"          3/8"
Home Depot
6.50
Princess auto      11.19 6.14
OK Building
5.88
BC Fasteners        5.47 2.52

I wish I had known about BC fasteners first, I would have saved about $80.  Granted it would have been a lower quality zinc plating but they will not be exposed to water anyway.


The Strong Ties are installed on almost all the rafters, just the first couple rafters to finish.  I also installed the outriggers for the loft gable end.


The friend that has been lending a hand from time to time was in town so we loaded out her truck with all the scrap wood.  The side and interior are much tidier now.


Expenses to date: $8,924