Showing posts with label insulation. Show all posts

Saturday, 31 May 2014

All about the roof

Even though rock wool is less itchy then fiberglass I still hate insulating.  I need the insulation in place before the fascia goes on.  This will allow me to cram extra insulation behind the fascia to make sure I get good coverage.  At this point I wish I had spent more time looking at spray foam.

Because I added the collar ties its taking longer to make all the cuts in the insulation.

I was excited to pick up the metal roofing.  I like the red :)

Expenses to date: $19,197

Sunday, 27 April 2014

So its been two months...


The tiny house has been on the back burner for the last couple of months.  I decided to focus on school and pretty much everything else was put on the back burner.  The last two weeks I've been off so I've put a lot more time into the house and I have a few tasks nearing completion so there should be some big changes in the next few weeks.

I have still accomplished a few things while in school.  The bay window is almost done.  It have wiring, sheathing, insulation and vapour barrier done.  With wiring passing through the bay window I have also been able to finish the wiring and insulation on the last wall.

The vapour barrier on the north wall is mostly done.  I just have to pass a few more wires thru it before I can finish.

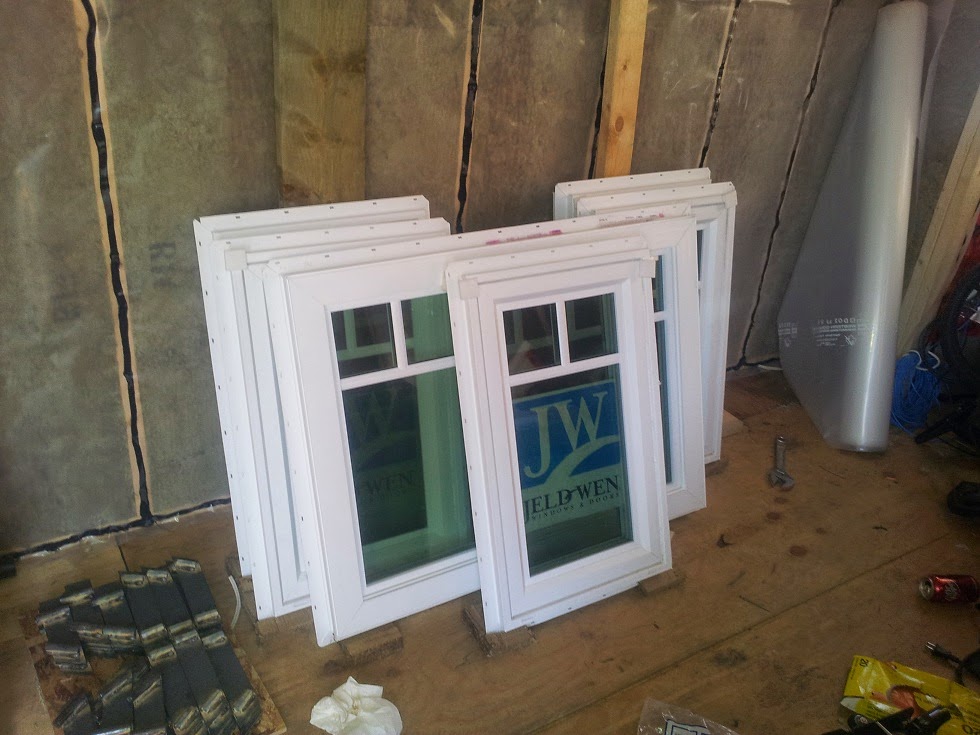
The windows have mostly arrived.  There was no packing during shipping so some of the screens where damages.  I have to make another trip to the states to pick up the last 3.

I found a store locally that has roofing for the same price as in the states.  They have more choice of colours so once that is sorted out then I'll be ordering it.  As a bonus they will cut to length for me.

I've been busy the last week fabricating the brackets for the roof extensions.  I have spent about 16 hours making the 40 brackets but I think the end result will be worth it.


I've been super geeking out over the performance of my solar setup.  It has been producing enough power to keep the welder going without having to run the generator.  At one point the panels where producing over 30A even though they are only rated to produce 22A.  :)

Expenses to date: $17,014

Thursday, 13 February 2014

Putting holes in the walls

I've been busy putting up the wall insulation and I'm about 3/4 done.  Just a few thin strips next to the interior wall, a couple of spots in the loft and between the door and the bay window.  I'll be putting vapour barrier up over the covered areas tomorrow.  The rest has to wait for the bay window.

 It looks so nice and even :)

 Putting holes in the north wall, nervous and exciting.  Furnace on the left and water heater on the right.

Water heater hole

I also wired up the electrical box the rear exterior plug.


There are two things that are really holding me up, the lack of bay window walls and I have to make the brackets for the 8" roof extensions.  These will allow the roof to be 9' 10" wide when parked.  I'm going to tackle the brackets first.  Once those are done then i can insulate the roof.
There is a total of 40 that I have to make.  That is whole lot of welding and cutting.

Expenses to date $12,028

Tuesday, 4 February 2014

Finishing in wall wiring and starting insulation

It's been a productive week.


Drilled 2 1/4" hole and installed the AC in connector.  I wanted to put in the void next to the wheel well but that didn't work out, this was the next best area.  I temporally wired it in with a 12 gauge interior wire until I can find a RV cord to use.  On the inside I connected up 3 plugs so I don't have to used the extension cords as much.

Ran through the 500ft box of network cable that I brought up from the states.  It was going to be $90 for another 500ft from Home Depot.  Luckily I managed to find 721ft for $60 on our local classified site.  I decided to run a DC line to the bay window area, I might end up using it for lighting or to run the computer and accessories directly.

There are around 20 network lines, 4 AC lines and 5 DC wires that feed into this area.  It looks like a mess be it will all be organized once the interior wall goes in.

Started installing the insulation on Saturday.  The bottom pieces are taking about 10 to 15 minutes each because I have to measure the locations of all the wires and rods so I can cut a slot in the insulation for them to slide into.

I even have some of the loft done

But it's still a mess :)


Expenses to date: $11,654

Thursday, 14 November 2013

Sawdust and Loft walls

Today and yesterday where busy days.  Between classes on Wednesday I picked up the wood for the rafters and ridge boards.  In the evening I went over to my brother's and cut all the rafters.  He has a very fancy siding compound miter saw that I needed to cut the 10" rafters for over the living room.  I decided to go with 24" O.C. over the living room with 5/8" TG plywood.  This will save about $80 and 100 lbs.  The loft will be 16 O.C. for two reasons; it only has a 15 degree pitch and I'm only using 8" rafters.

I started today putting the vapour barrier between the loft floor and bathroom wall.  It was an interesting job because I had to put the acoustic sealant between the studs and vapour barrier.  In hind sight I should have done this before I put the loft floor in. Next I put the subfloor back down after letting it dry out for the last week.  I spent the evening putting together the two loft walls.

Expenses to date: $8,294

Saturday, 5 October 2013

Just a little rant about vapour barrier.

After the last storm I went back to the low slung tarp setup.  It continued to rain for the next 3 days but the rock wool still managed to dry out under the tarps.  On Thursday I install the remaining batts.  An important note, I did not put any insulation on top of the sewer pipe, this is to minimize the risk of them freezing in the winter.  Because of the extra 2" drop in this part of the floor the pipe have between R12 and R22 underneath them.  Friday I had a friend giving me a hand.  We installed the foam board insulation over the frame, the 1 1/2" board gives a nice R value of 10.  We also put the 6 mil vapour barrier down.  I just have to tape where the pipes pass through the plastic and staple the edges down.  Next stop sub floor!

This is one of the few things I have to rant about.  I've seen how this is handled in most parts of the states and it is shit.  The vapour barrier is usually little more then tar paper stapled to the studs.  I'm not even sure what the point is of wasting staples on that.  Here in Canada the only accepted way is 6 mil plastic sheets.  It comes in 100' x 10' rolls so you can do a whole wall with no seams and lots of room for overlap.  I took it one step further and used acoustic sealant on all the joists.  Acoustic sealant is gooey tar that never dries.  When I screw the sub floor down the acoustic sealant will seal the screw holes.
Rant off


Expenses to date: $6,461

Sunday, 29 September 2013

Vacuuming insulation

Around 11 last night we had a storm come through.  The shelter was flexing significantly so I had to pull the tarps down and recover the trailer.  All the insulation got rained on while I was doing this.  Luckily the rock wool is hydrophobic.  This morning I vacuumed up the water that was still sitting on the batts and the little that had soaked in.  Had this been fiberglass I would be pulling it all out and replacing it.

Saturday, 28 September 2013

Insulating the floor

First as promised, my sketchy rain shelter.  It won't stand up to snow but the roof should be on before then.  The center beam is made up of two 2x4x14s butted up end to end and a 2x4x8 spanning the joint.  Hopefully there is no wind.

It was pretty hairy putting this up and it included almost having the main beam dropping onto the solar panels.  It will be a lot easier taking it down.


I spent Friday and today putting the insulation in for the floor.  My first choice was wool from Oregon Shepard but they didn't reply to my inquiries.  I ended up going with rock wool and here are my reasons:
  • loose fill has a lower R-value per inch
  • loose fill has to fluffed up
  • fiberglass is itchy and has a slightly lower R-value
  • rock wool is pretty dense and will probably resist settling and shifting
  • rock wool is fairly water resistant
  • rock wool was $220 vs fiberglass $130

My little spreadsheet to help my choice


Floor insulation


Cubic ft needed 92


ruxul loose ruxal batt FG loose FG batt Cellulose
Coverage/pkg in cubic feet 22.49 18.24 56.63 35.89 18.12
Cost/pkg 34.47 36.38 36.20 43.66 14.22
Weight/pkg 33.00 42.10 30.00 29.90 25.35


R/inch 2.82 4.00 2.70 3.64 3.33


Weight/cu ft (lbs) 1.47 2.31 0.53 0.83 1.40
Cost/cu ft 1.53 1.99 0.64 1.22 0.78
Cost/R 0.045 0.042 0.020 0.028 0.020


Weight total (lbs) 134.51 211.56 48.57 76.37 128.24
Bags needed 5.00 6.00 2.00 3.00 6.00
Cost 172.35 218.28 72.40 130.98 85.32


Now the fun part, installing it.  I wore long sleeves, leather gloves and a mask.  Rock wool is nowhere near as itchy as fiberglass and it washes off much easier.  I found it would give slivers without the gloves. I've finished installing 3 1/2 bags out of five.